Control Board
Should the trouble shooting section instruct you to replace the the control board, follow these steps:

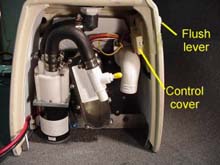
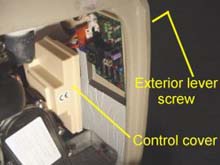
1) Remove flush lever screw from exterior handle.
Remove discharge fitting.
Gently pull the control board cover until it unsnaps.
Remove discharge fitting.
Gently pull the control board cover until it unsnaps.

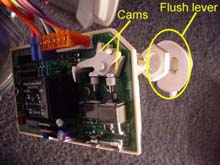
2) Remove securing nut below flush lever and remove control cover and board assembly.

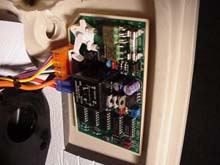
3) Note position of the wires that are connected to the control board as well as the position of the jumpers (flush duration and control options).
Reset the new board to these settings if necessary.
Reinstall new control board in reverse order.
Reset the new board to these settings if necessary.
Reinstall new control board in reverse order.

